
Autoship & Save
Automated
Get replacement filters delivered to your door step on time.
Savings
Always 15% off on Autoship filters.
Convenience
Always have clean and healthy water for your entire family.
Control
Skip, delay, get it sooner, or cancel anytime. You are in full control.
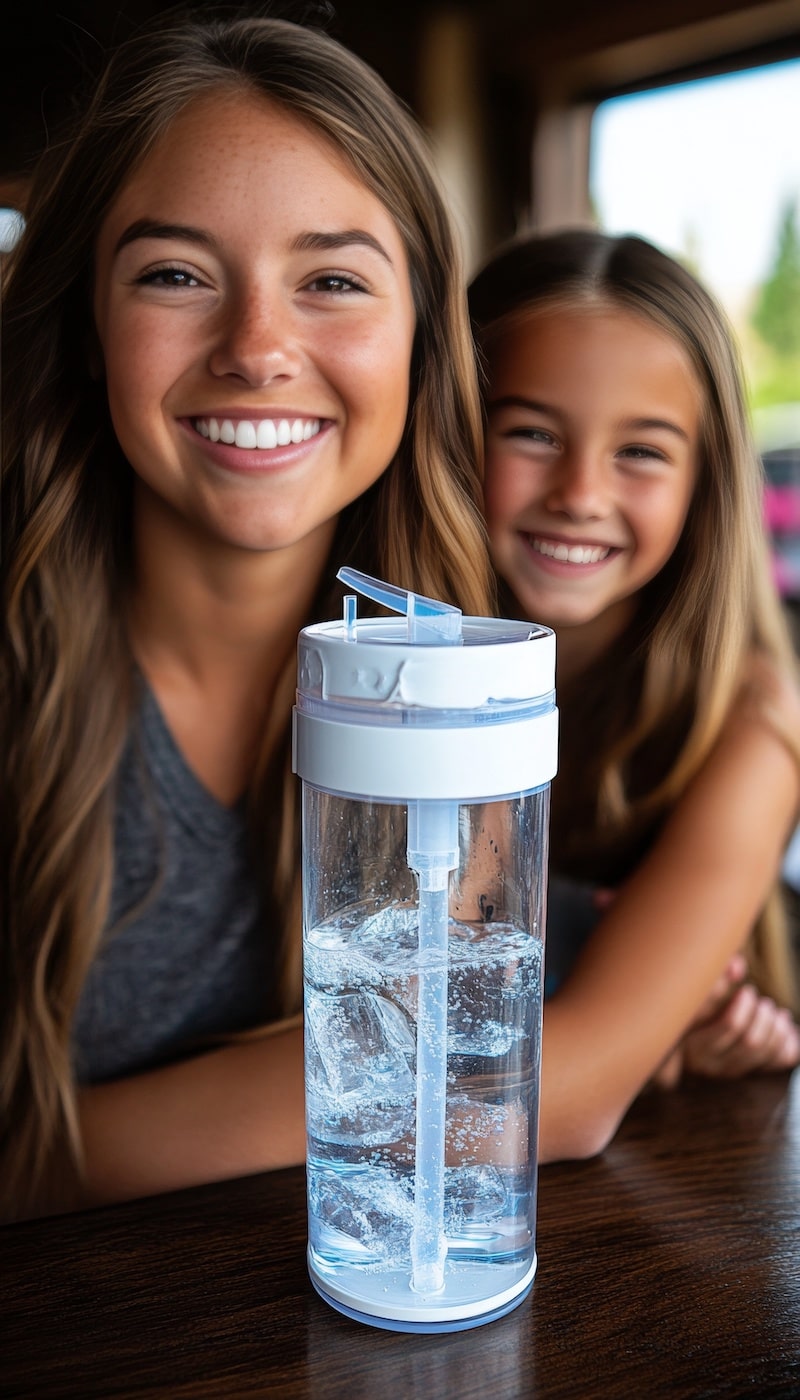
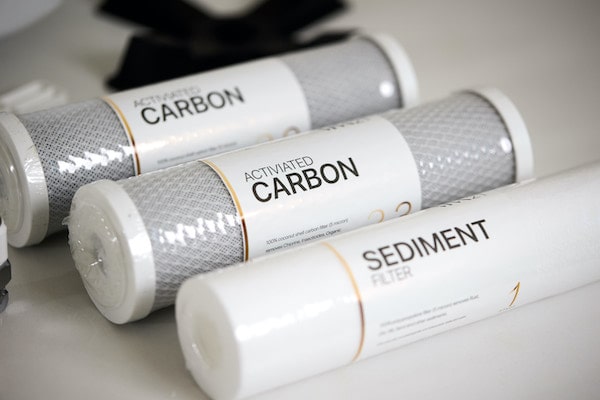
Premium High Capacity Stage 1-3 Pre-Filter Set
Keep your reverse osmosis system running at peak performance with our Pre-Filter Replacement Set, guaranteed 1 year capacity. Designed to capture sediment, chlorine, and other impurities early, it extends the life of your reverse osmosis system while ensuring cleaner, safer water.
Frequently Asked Questions
How does Autoship work?
How does Autoship work?
Our Autoship program automatically delivers your replacement filters at the recommended interval, so you never have to worry about forgetting to change them. This ensures your system continues performing at peak efficiency year-round.
Also, you will always receive 15% off on Autoship filters.
Can I skip or cancel my shipments?
Can I skip or cancel my shipments?
Yes. You can always choose your preferred schedule, skip, pause shipments, or get them sooner.
You’re fully in control, and you can update your plan anytime from your account dashboard.
How often should I change my RO filters?
How often should I change my RO filters?
Most pre-filters should be replaced every 6–12 months depending on your water quality and usage. Our high capacity pre-filter set guarantees a 12-month filter life. The RO membrane typically lasts 24 months. Our Autoship program delivers the correct filters at the recommended intervals so your system always performs at its best.
Are our filters compatible with other RO brands?
Are our filters compatible with other RO brands?
Yes. Our filters are compatible with most traditional RO systems including APEC, Express Water, and iSpring.
Our filters are designed with standard RO sizing and universal quick-connect fittings, making them compatible with most major under-sink reverse osmosis systems on the market.
Blog posts

Countertop vs. Under-Sink RO: Which Is Better for Apartments and Renters?
Living in an apartment shouldn’t mean compromising on the quality of your drinking water. Whether you are dealing with chloramines, heavy metals, or simply the unpleasant taste of municipal tap water, a Reverse Osmosis (RO) system is the gold standard for purification. However, as a renter, you face a unique set of constraints. You have limited space, strict lease agreements, and the reality that you will eventually have to pack up and move. When shopping for an RO system, the choice inevitably boils down to two main configurations: Countertop RO systems and Under-Sink RO systems. Both deliver exceptionally pure, bottled-water-quality water, but they suit entirely different living situations. This guide will show you the science, the installation practicalities, and the long-term costs to help you decide which system is the best investment for your apartment. How Do They Compare in Purification? Before looking at the design differences, it is important to understand that both systems use the exact same fundamental technology. Reverse osmosis works by forcing pressurized water through a semipermeable membrane with microscopic pores (typically around 0.0001 microns). This physical barrier removes up to 99% of dissolved solids (TDS), including lead, fluoride, arsenic, microplastics, and chlorine byproducts. Whether you choose a countertop unit or an under-sink installation, the filtration efficacy is virtually identical, provided you use high-quality, multi-stage filters. The real difference lies in how water enters the system, how it is stored, and how it is delivered to your glass. Option 1: Countertop RO Systems (The Portable Solution) Countertop RO systems are freestanding appliances that sit directly on your counter. Most modern countertop units are tankless and plug-and-play, requiring zero connection to your apartment's plumbing. You simply fill a removable source water tank at the sink, place it back on the unit, and the system filters the water into an internal carafe or dispenses it on demand. The Pros: Zero Installation & Damage-Free: There is absolutely no drilling, plumbing modifications, or risk of water leaks behind the walls. You can unbox the unit and have pure water in under five minutes. 100% Renter-Friendly: Because it does not modify the property, you have zero risk of losing your security deposit due to plumbing alterations. Extreme Portability: When your lease is up, you simply empty the water, pack the unit into a box, and take it to your next home. Smart Features: Many premium countertop RO purifiers feature instant heating options, allowing you to dispense hot water for tea, coffee, or baby formula at the touch of a button. The Cons: Sacrifices Counter Space: If you have a tiny kitchen with minimal prep space, dedicating a footprint to a countertop appliance can feel restrictive. Manual Refilling: Since these units are not connected to a continuous water line, you must manually refill the feed-water tank and empty the concentrated waste-water tank. Lower Daily Output: Because they rely on manual refills, they are best suited for individuals, couples, or small families rather than high-volume households. Option 2: Under-Sink RO Systems (The Seamless, High-Volume Powerhouse) Under-sink RO systems are installed inside the cabinet beneath your sink. They connect directly to your cold-water line, divert a portion of the water through the filtration stages, and deliver pure water through a dedicated auxiliary faucet mounted on your sink. The Pros: Clutter-Free Kitchens: The entire filtration apparatus, including filters, membranes, and connections, is completely hidden away out of sight. Continuous, On-Demand Water: Connected directly to your plumbing, these systems offer a continuous supply of purified water. There are no reservoirs to manually refill. Higher Flow Rates: Under-sink systems typically deliver water much faster than countertop counterparts, making them ideal for cooking, filling large pots, and serving larger households. Longer Filter Lifespans: Because under-sink cartridges are physically larger, they often require less frequent replacements than the compact filters found in countertop units. The Cons: Complex Installation: Installing an under-sink system requires tapping into your cold-water line and connecting a wastewater drain saddle to your sink’s drainpipe. The "Faucet Hole": Under-sink systems require a dedicated faucet. If your rental sink does not have an existing, unused hole (such as a pre-drilled hole for a soap dispenser or sprayer), you will have to drill a hole through the countertop or sink basin, which is a modification most landlords strictly prohibit. Moving Hassles: Uninstalling the system, restoring the original plumbing connections, and patching up the system when you move out is a time-consuming process. Head-to-Head: Countertop vs. Under-Sink RO Feature Countertop RO Systems Under-Sink RO Systems Installation Difficulty None (Plug & Play) Moderate (Requires plumbing access) Plumbing Modifications None Yes (Tapping cold water line & drain) Portability Excellent (Pack and go) Low (Requires uninstallation & restoration) Counter Space Needed Moderate footprint None (Hidden under the cabinet) Water Supply Manual refill tank Continuous (Direct from water line) Best Suited For Studio apartments, frequent movers Long-term renters, large families Key Decision Factors for Apartment Renters To determine which setup is right for your current living situation, ask yourself these three critical questions: 1. What does your lease agreement say? Read your lease carefully. Many property management companies have strict "no plumbing modifications" clauses. If your landlord conducting a routine inspection finds unauthorized connections under the sink, it could lead to lease violations. If you want a completely stress-free tenancy, a countertop RO system is the safest bet. 2. Does your sink have an extra prep hole? Look at your kitchen sink. If there is a plastic cap covering an extra hole, or a soap dispenser you are willing to temporarily remove, you can install an under-sink faucet without drilling. If you have solid granite, quartz, or marble countertops with no extra holes, drilling is a hard "no-go" for renters, making a countertop water purifier your only viable option. 3. How long do you plan to stay? If you are on a short-term lease or plan to move within the next 12 to 18 months, the effort of installing and uninstalling an under-sink system is rarely worth it. However, if you have signed a multi-year lease and value having a completely clear countertop, the one-time setup of an under-sink unit is a highly rewarding investment. The Verdict There is no single "best" system, only the system that aligns with your space, your lifestyle, and your lease agreement. Choose a Countertop RO System if: You rent a small apartment, move frequently, want a stress-free setup with zero plumbing risks, or love the convenience of instant hot water dispensing. Choose an Under-Sink RO System if: You have a long-term lease, a busy household that uses lots of water for both drinking and cooking, and a sink setup that allows for a dedicated faucet without drilling new holes. Both paths lead to the same destination: clean, delicious, contaminant-free water right at home. Take a look at your kitchen layout, review your lease, and choose the system that makes drinking healthy water effortless.
Learn more
Why Modern Homes Are Frequently Built with Under-Sink RO Systems
If you have toured a newly constructed home or participated in a modern kitchen remodel recently, you have likely noticed a sleek, secondary faucet sitting next to the main kitchen tap. This isn't just a design trend, it is the visible component of an under-sink Reverse Osmosis (RO) water filtration system. More homeowners and builders are prioritizing these systems from day one. But what is driving this widespread adoption, and is a compact under-sink RO system truly worth the investment for your household? Let us dive into the science, the financial benefits, and why these systems have become a staple of modern residential design. What is an Under-Sink RO System? Reverse osmosis is a highly sophisticated filtration process. While standard carbon pitchers merely mask taste or trap large particles, an RO system forces water through a semipermeable membrane under pressure. This membrane features microscopic pores roughly 0.0001 microns in size. To put that into perspective, a single human hair is about 70 microns wide. Because the pores are so small, the system rejects up to 99% of total dissolved solids (TDS), leaving you with exceptionally pure drinking water. Under-sink models are specifically engineered to sit discreetly inside your kitchen cabinet, connecting directly to your cold water line and a dedicated countertop faucet. 4 Reasons Modern Homes Feature Under-Sink RO Systems 1. Superior Contaminant Removal and Health Security Modern municipal water treatment plants do an incredible job of delivering water that meets baseline safety standards. However, aging city infrastructure can introduce impurities like lead or copper as water travels to your tap. Furthermore, emerging contaminants like PFAS (often called "forever chemicals"), microplastics, and high levels of nitrates frequently bypass standard city filtration. An under-sink RO system acts as your final, foolproof line of defense. It consistently removes: Heavy metals (lead, arsenic, chromium) Chemical pollutants (chlorine, fluoride, PFAS) Microscopic cysts, bacteria, and viruses Dissolved salts and scale-causing minerals For families prioritizing long-term wellness, having a certified purification method directly at the point of consumption offers immense peace of mind. 2. Seamless Kitchen Design and Space Optimization In modern interior design, minimalism and clean countertops are highly valued. Clunky countertop filters or bulky water cooler dispensers conflict with this aesthetic. Under-sink RO systems solve this problem by remaining completely hidden from view. The filtration stages and storage tank tuck away neatly underneath the sink, leaving only a low-profile, premium faucet visible on the deck. Modern systems are increasingly compact, ensuring you still have plenty of room for cleaning supplies and your garbage disposal. 3. The Culinary Advantage: Better Tasting Food and Coffee If you have ever noticed a bitter aftertaste in your morning coffee or a distinct chemical smell when boiling water, municipal chlorine or heavy mineral content is likely the culprit. Pure water changes how you cook. Professional chefs and baristas rely on RO water because it provides a completely neutral canvas. Without chlorine or excess minerals interfering, the true flavor profiles of your coffee beans, tea leaves, soups, and home-cooked dishes can shine through. 4. Long-Term Financial Savings and Environmental Sustainability Purchasing single-use bottled water or heavy 5-gallon jugs is both financially draining and environmentally damaging. Consider the math: a typical family of four drinking a healthy amount of water can easily spend hundreds of dollars a year on bottled water. An under-sink RO system provides the exact same or higher purification quality for pennies per gallon. By switching to an in-home system, you drastically reduce your household's plastic waste footprint while enjoying the convenience of an endless supply of pure water on demand. How to Choose the Right Under-Sink RO System for Your Home Investing in a water filtration system requires evaluating your specific household needs. Here are the core factors to look for before making a purchase: TDS and Contaminant Reduction Efficiency: Look for systems that explicitly state their filtration capabilities and hold trusted certifications (such as NSF/ANSI standards) for removing specific toxins like lead or PFAS. Remineralization Stages: Because RO filtration is so thorough, it removes beneficial minerals along with the harmful ones. Many premium systems now feature an alkaline remineralization stage that adds trace amounts of calcium and magnesium back into the water, balancing the pH and giving it a crisp, refreshing taste. Ease of Installation and Filter Replacement: If you prefer DIY projects, look for systems that feature quick-connect fittings and simple, tool-free filter replacements. High-quality brands design their systems so filters can be swapped out in under 60 seconds. Daily Production Rate (GPD): Measured in Gallons Per Day, this dictates how fast the system purifies water. The Bottom Line An under-sink RO system is no longer viewed as a luxury add-on, it is a practical upgrade for modern living. By offering a continuous stream of purified water right at your fingertips, it protects your family's health, elevates your culinary experiences, eliminates plastic waste, and adds tangible value to your property. If you are ready to upgrade your home’s water quality, exploring a certified, high-efficiency under-sink RO system is the perfect place to start.
Learn more
What Are Chloramines in Tap Water and How Do You Remove Them?
If you have noticed a persistent, swimming-pool-like smell in your drinking water, even after passing it through a standard pitcher filter, you are likely dealing with chloramines. Over the last few decades, thousands of municipal water treatment facilities across the globe have quietly shifted their disinfection methods. While traditional chlorine was once the gold standard for keeping public water safe from pathogens, many cities have transitioned to a more persistent alternative: chloramines. But what exactly are chloramines, how do they affect your health and home, and what is the most effective way to remove them? In this guide, we will talk about chloramines and explore the most reliable filtration technologies to ensure your family enjoys truly clean, great-tasting water. Chlorine vs. Chloramines: What Is the Difference? To understand how to remove chloramines from tap water, it helps to understand what they are. Chlorine is a highly reactive gas. When added to water, it quickly neutralizes bacteria and viruses. However, because it is so reactive, it dissipates rapidly into the air. This means water traveling to the very end of a city’s pipeline might lose its protective disinfection. Chloramines are chemical compounds formed by mixing chlorine with ammonia. The most common form used in water treatment is monochloramine. Unlike free chlorine, chloramines are incredibly stable. They do not evaporate easily and remain active in the water distribution system for a long time. While this stability is a major benefit for municipal water plants, it presents a massive challenge for home water filtration. Because chloramines do not break down easily, standard carbon filters that easily remove chlorine often fail to eliminate chloramines. Why Are Chloramines Used in Municipal Water? Water treatment plants prefer chloramines for two primary reasons: Long-Lasting Disinfection: Because they break down slowly, chloramines protect the municipal water supply all the way from the treatment plant to your kitchen tap. Fewer Disinfection Byproducts (DBPs): When free chlorine reacts with natural organic matter in water, it can create harmful, regulated byproducts like trihalomethanes (THMs), which are linked to long-term health risks. Chloramines produce significantly fewer of these specific byproducts. Despite these operational advantages, chloramines are far from ideal by the time they reach your glass. Are Chloramines in Drinking Water Safe? According to the EPA, drinking water with chloramine levels up to 4 milligrams per liter is considered safe for human consumption. However, "safe" does not necessarily mean desirable. Many homeowners choose to remove chloramines due to several key concerns: Taste and Odor: Chloramines give tap water a distinct chemical taste and a strong, unpleasant odor that can ruin the flavor of coffee, tea, and home-cooked meals. Skin and Eye Irritation: Showering in chloraminated water can strip natural oils from your skin and hair, leading to eczema flare-ups, dry skin, and itchy, red eyes. Corrosiveness to Plumbing: Chloramines are highly corrosive. They can degrade copper pipes, lead solder, and rubber plumbing components (such as toilet flappers and water heater gaskets) over time, potentially leading to costly leaks or heavy metal leaching. Toxicity to Pets and Aquariums: While humans can metabolize small amounts of chloramines, they are highly toxic to fish, reptiles, and amphibians because the chemical enters their bloodstream directly through their gills or skin. Why Standard Carbon Pitchers Fall Short Many people assume that a basic, store-bought carbon pitcher filter is enough to clean their tap water. While these simple filters can reduce free chlorine, they are largely ineffective against chloramines. Removing chloramines requires breaking the strong chemical bond between the chlorine and ammonia molecules. Standard Granular Activated Carbon (GAC) removes contaminants through adsorption. Because the chloramine bond is so stable, water must stay in contact with the carbon for an exceptionally long time (known as "contact time") to break it down. In a typical pitcher filter where water flows quickly through a tiny amount of carbon, chloramines simply pass right through. How to Remove Chloramines from Tap Water: The Multi-Stage RO Solution To effectively eliminate chloramines from your drinking water, you need a system that overcomes the "contact time" challenge. This is where a multi-stage Reverse Osmosis (RO) system combined with high-capacity activated carbon filters becomes the gold standard for home water purification. An RO system does not rely on a single filter. Instead, it uses a strategic, multi-stage process to systematically dismantle and remove chloramines: 1. High-Density Activated Carbon Pre-Filtration (Stages 1 & 2) Before the water even reaches the RO membrane, it passes through specialized, high-density activated carbon block filters. The Contact Time Advantage: An under-sink RO system processes water at a controlled, systematic pace. This significantly increases the contact time between the water and the activated carbon. Breaking the Bond: This prolonged contact allows the premium activated carbon to successfully break the stubborn chloramine bond, trapping the chlorine component and freeing the remaining ammonia. 2. The Advanced Reverse Osmosis Membrane (Stage 3) Once the activated carbon pre-filter has broken the chloramine chemical bond, the water is forced through a semi-permeable RO membrane with microscopic pores (0.0001 microns). The RO membrane easily rejects the separated ammonia ions, flushing them away along with up to 99% of other contaminants like heavy metals, fluoride, lead, and microplastics. 3. Activated Carbon Post-Filtration (Stage 4) Finally, the water passes through a post-activated carbon filter. This final stage acts as a polishing filter, capturing any remaining trace tastes or odors and ensuring your water flows into your glass with a crisp, refreshing, and completely pure taste. Finding the Best Water Filter for Chloramines If you are ready to upgrade your home’s water quality, keep these key factors in mind before you buy: Choose Multi-Stage Systems: Look for a system that combines both high-capacity activated carbon blocks and an RO membrane. This combination is essential for handling complex municipal disinfectants like chloramines. Look for Certified Performance: Ensure the system you choose is tested to rigorous industry standards (such as NSF/ANSI Standard 58 for reverse osmosis systems) to guarantee reliable contaminant reduction. Consider an Under-Sink RO System: An under-sink reverse osmosis system is the most convenient way to secure a continuous supply of purified water for drinking, ice makers, and cooking without taking up valuable counter space. Check Maintenance Requirements: Look for systems with twist-and-lock, easy-to-replace filter cartridges so you can maintain peak performance year after year without needing to hire a plumber. Upgrade Your Water Quality Today While municipal water treatment keeps water safe from bacteria, you do not have to settle for the chemical taste, odor, and potential plumbing damage caused by chloramines. Short-contact pitcher filters cannot solve the problem, but a dedicated home purification system can. Investing in a multi-stage system is an investment in your family’s health, your home’s plumbing, and the daily enjoyment of your food and beverages. Explore our Premium WQA-Certified Reverse Osmosis Water Purifier. Equipped with high-capacity activated carbon filtration and advanced RO membranes, our systems are engineered to bring pristine, chemical-free water straight to your home.
Learn more