

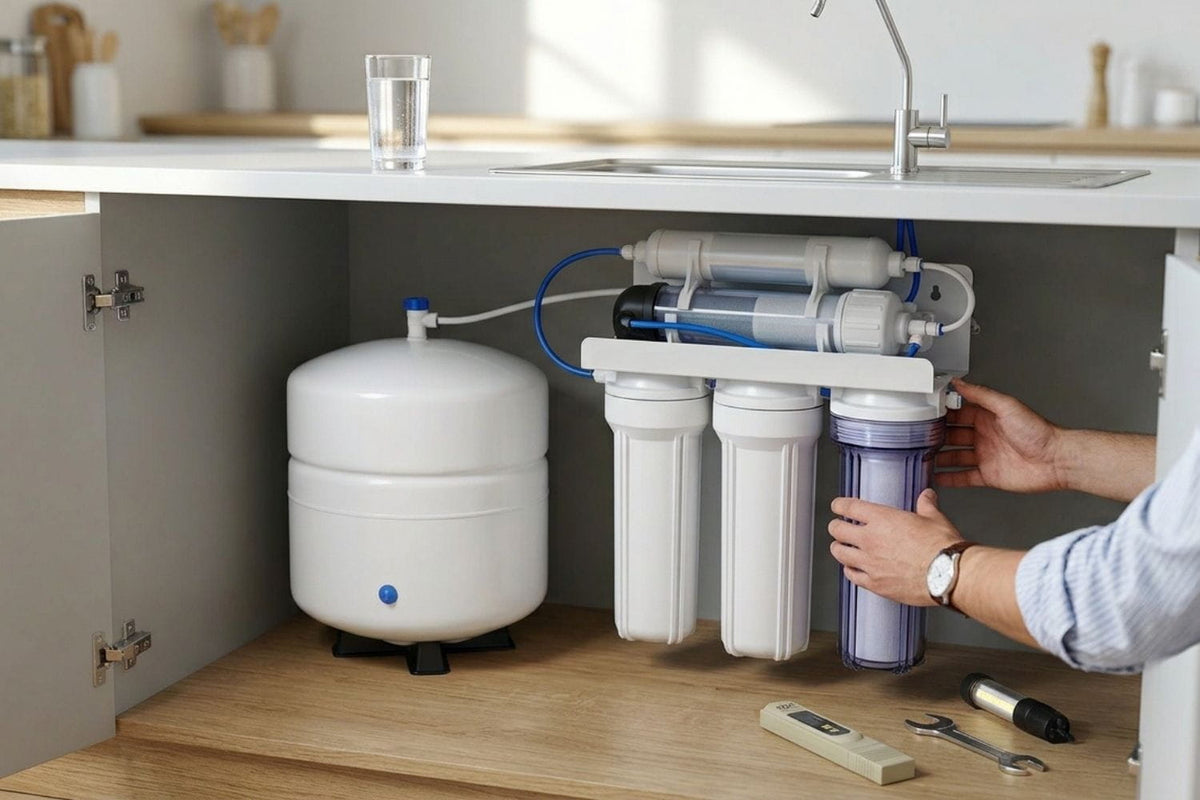
Reverse Osmosis (RO) remains one of the most effective home water filtration technologies available, removing up to 99% of total dissolved solids (TDS), including heavy metals, microplastics, fluorides, and chemical contaminants.
However, an RO unit is not a "set-it-and-forget-it" appliance. Like a high-performance engine, it relies on a multi-stage filtration process where each component plays a protective role. Neglecting routine maintenance doesn't just result in slow water flow, it can compromise water quality, damage the delicate RO membrane, and lead to unwanted microbial buildup.
To help you keep your drinking water pure and your system running efficiently year-round, we’ve put together a straightforward, step-by-step maintenance schedule broken down into 3, 6, and 12-month intervals.
Why Proper RO Maintenance Matters
According to data from the U.S. Environmental Protection Agency (EPA), household tap water quality varies significantly depending on regional source water, plumbing age, and local municipal treatments. Sediments, chlorine, and minerals naturally place strain on filtration media.
In a standard multi-stage RO setup, earlier stages act as physical shields for later stages:
-
Sediment filters trap silt, rust, and debris. If clogged, water pressure drops, preventing the system from pushing water through the membrane.
-
Activated carbon filters adsorb chlorine and volatile organic compounds (VOCs). Chlorine is the primary enemy of thin-film composite (TFC) RO membranes; exposure to unfiltered chlorine oxidizes and permanently degrades the membrane's microscopic pores.
-
The RO Membrane rejects microscopic dissolved solids down to 0.0001 microns.
A disciplined checklist ensures each filter is replaced before it fails, saving you money on premature membrane replacements and keeping your tap water pure.
The Maintenance Schedule: 3, 6, and 12 Months
Every 3 to 6 Months: Sediment Pre-Filter & Visual Inspection
Primary Focus: Physical Protection & Flow Rate Health
The sediment filter is your system's first line of defense. Depending on your home’s water hardness and sediment levels, this filter works continuously to block rust flakes, sand, and fine particles.
-
Inspect the Sediment Housing: If you have a clear pre-filter housing, check the color of the cartridge. A transition from clean white to light brown is normal. If it appears dark brown, caked in mud, or if you notice a drop in faucet flow rate, swap it out.
-
Check for Minor Leaks: Take a quick look under your sink with a flashlight. Examine the quick-connect fittings, shut-off valve, and filter housing rings for micro-beads of moisture.
-
TDS Spot Check: Use a simple handheld TDS (Total Dissolved Solids) meter to measure your tap water versus your RO water. This gives you a baseline for system performance.
Pro Tip: If your home experiences frequent plumbing repairs in the street or uses well water, your sediment filter may need attention closer to the 3-month mark. For standard municipal supplies, 6 months is typically ideal.
Every 6 to 12 Months: Carbon Block & Post-Filters
Primary Focus: Chlorine Protection & Taste Refinement
At the 6-month mark, it’s time to maintain the media responsible for taste, odor, and chemical removal.
-
Replace Carbon Pre-Filters (GAC / Carbon Block): Chlorine and chloramines degrade RO membranes over time. Regular replacement of carbon pre-filters guarantees that chlorine never touches the membrane.
-
Replace Inline Post-Carbon Filters: Located between the storage tank and the faucet, this filter polishes the water as it leaves the tank, eliminating any lingering stale tastes or residual odors.
-
Inspect Remineralization Filters (If Applicable): Pure RO water is slightly acidic due to the removal of alkaline minerals. Remineralization cartridges introduce essential natural minerals back into the water (such as calcium and magnesium) to balance pH and enhance taste. Check if your alkaline cartridge is reaching its rated gallon capacity.
Every 12 to 24 Months: Deep Cleaning, Tank Check & RO Membrane Testing
Primary Focus: System Sanitization & Core Filtration Performance
Once a year, give your RO unit a comprehensive annual review. This ensures the unit remains hygienic and structurally sound.
-
Test the RO Membrane Rejection Rate: The RO membrane usually lasts between 24 months (sometimes up to 36 months under optimal conditions). Test its efficiency using a TDS meter. If the rejection rate falls below 85–90%, it is time to replace the RO membrane.
-
Check Storage Tank Air Pressure: Empty the water storage tank completely. Use a low-pressure tire gauge to check the tank's air valve. It should read around 5 to 7 PSI when empty. Low air pressure results in low water delivery volume at the faucet.
-
Sanitize the System: During filter changes, clean and sanitize the filter housings and storage tank using food-grade sanitizing solutions or standard unscented household bleach diluted per manufacturer guidelines. This prevents biofilm growth inside the water storage environment.
RO Maintenance Quick Reference Guide
|
Component |
Recommended Interval |
Key Function |
Sign of Replacement Needed |
|
Sediment Pre-Filter |
3 – 6 Months |
Traps dirt, sand, rust, particulate matter |
Slow flow, visible dark discoloration |
|
Carbon Block Filter |
6 – 12 Months |
Removes chlorine, VOCs, bad odors |
Chlorine smell, reduced membrane protection |
|
RO Membrane |
24+ Months |
Filters down to 0.0001 microns (metals, TDS) |
TDS reduction drops below 85% |
|
Post-Carbon / Remineralizer |
6 – 12 Months |
Polishes taste, restores natural pH balance |
Flat/acidic taste, reduced mineral output |
Simple Tips to Extend the Life of Your RO System
-
Never Run Hot Water Through the System: RO membranes are heat-sensitive and designed exclusively for cold water supply lines (33°F – 100°F). Hot water can melt or rupture the internal membrane layers.
-
Keep Up with Pre-Filters: Delaying a $15 pre-filter replacement can ruin a RO membrane ahead of time. Think of pre-filters as routine oil changes for your water purifier.
-
Use Fresh O-Rings & Food-Grade Silicone: When changing filter sumps, lubricate the rubber O-rings with food-grade silicone grease to prevent leaks and ensure a tight seal. Replace worn O-rings immediately.
Looking for Reliable Replacement Parts & Systems?
Whether you need routine replacement cartridges or are looking to upgrade your home's water filtration setup, selecting certified, precision-engineered components makes maintenance effortless.
At Filter United, we specialize in high-efficiency filtration solutions tailored for modern households. Our flagship VIVA21 series offers versatile setups designed to suit different water quality needs:
-
VIVA21 5-Stage WQA-Certified Reverse Osmosis System: Built to rigorous industry standards for maximum reduction of heavy metals and contaminants.
-
VIVA21 6-Stage Remineralization Reverse Osmosis System: Combines deep RO filtration with natural mineral restoration for perfectly balanced, delicious drinking water.
-
Maintenance Ready: We offer dedicated Complete Filter Sets, Pre-Filter Sets, individual replacement filters, and high-durability installation accessories so your system operates seamlessly year after year.
Regular maintenance ensures that every glass of water from your tap is clean, safe, and refreshing. Set a reminder on your calendar today, keep a spare set of filters on hand under your sink, and enjoy peace of mind with every sip!


