

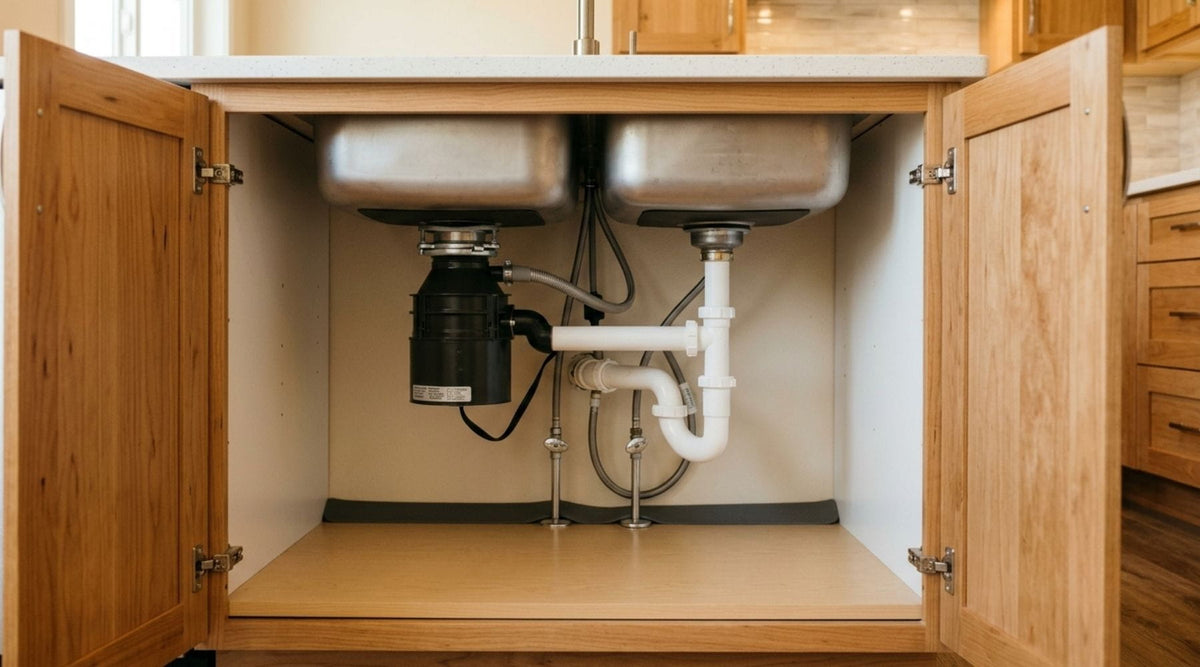
Upgrading your home’s drinking water with a reverse osmosis (RO) system is one of the single best investments you can make for your health and daily convenience. Opening the cabinet doors beneath your kitchen sink often reveals a crowded landscape of drain pipes, P-traps, garbage disposals, shut-off valves, and cleaning supplies. Fitting a high-performance multi-stage filtration system into this space requires accurate measuring and a clear understanding of clearance requirements.
In this article, we will tell you the exact dimensional requirements, plumbing clearances, and structural considerations you need to measure twice before buying an under-sink RO system.
1. Why Under-Sink Space Planning Matters
Installing a reverse osmosis water filter isn't just about forcing a plastic housing into a vacant corner. Adequate clearance directly impacts four crucial performance and maintenance factors:
-
Filter Maintenance & Cartridge Swaps: RO systems require regular filter cartridge changes, which is typically every 6 to 12 months for pre-filters and 2 to 3 years for the RO membrane. If you don't leave vertical or horizontal clearance, replacing a canister will mean uninstalling the entire manifold every time.
-
Tubing Bending Radii: Flexible polyethylene water lines need smooth curves to maintain optimal pressure. Sharp 90-degree kinks in 1/4-inch or 3/8-inch tubing restrict flow and can lead to premature fitting failure or leaks.
-
Leak Detection & Safety: Leaving 2 to 3 inches of clear space around connection ports allows you to inspect quick-connect fittings and easily install an automatic leak detector valve at the base of your cabinet floor.
2. Standard Dimensions: Tank vs. Tankless RO Systems
The amount of space you need depends primarily on the design architecture of the filtration system you choose.
|
System Component / Type |
Average Height |
Average Width |
Average Depth |
Key Clearance Consideration |
|
Traditional Tank-Based Manifold |
15" – 18" (38–46 cm) |
14" – 17" (35–43 cm) |
5" – 7" (13–18 cm) |
Requires 2" top clearance for tube routing |
|
Standard 3.2-Gallon Storage Tank |
14" – 16" (35–40 cm) |
11" – 12" (28–30 cm) |
11" – 12" (28–30 cm) |
Can be placed upright or laid on its side |
|
Modern Tankless (Direct-Flow) System |
14" – 16" (35–40 cm) |
5" – 8" (13–20 cm) |
16" – 18" (40–46 cm) |
Requires front clearance to pull out filter cartridges |
The Math for Traditional Tank-Based Systems
A classic multi-stage under-sink RO system consists of two separate physical elements: the filter manifold assembly and the pressurized water storage tank.
-
Total Width Needed: Combined side-by-side, you will need approximately 25 to 30 inches of usable cabinet width.
-
Total Height Needed: A minimum of 18 inches of vertical clearance from the cabinet baseboard to the lowest hanging pipe obstruction.
-
Total Depth Needed: At least 14 to 16 inches of clear depth from the back wall/pipes to the inside edge of the closed cabinet door.
Pro Tip: If horizontal width is limited by a garbage disposal, the pressure storage tank can often be placed in an adjacent cabinet by drilling a small pass-through hole for the 1/4-inch water line, or laid horizontally using a tank stand.
3. How to Accurately Measure Your Under-Sink Cabinet
Before you order your under-sink RO system, take out a tape measure and evaluate your space using this step-by-step framework:
Step 1: Measure the "Real" Usable Width
Measure the interior width of the cabinet base. Subtract the space occupied by fixed obstacles, such as:
-
Garbage disposal unit (typically occupies 7" to 9" of width on one side).
-
Drain line P-traps and wall connection points.
-
Sink basin depth (undermount sinks extend lower into the cabinet than drop-in models).
Step 2: Measure Vertical Clearance with Filter Removal in Mind
Measure from the cabinet floor to the lowest point of your sink basin or plumbing fixtures.
-
Important: Traditional drop-down filter housings require an extra 2 to 3 inches of downward clearance underneath the unit to twist off and pull down the filter sumps during routine maintenance.
Step 3: Account for Door Hinges and Plumbing Valves
Measure the cabinet depth from the back wall to the inside of the door frame. Remember to account for:
-
Protruding angle stop valves (cold water shut-off).
-
Cabinet door hinges that extend inward when closed.
-
Electrical outlets or junction boxes (if installing a powered pump or UV stage).
Step 4: Verify Faucet Hole Compatibility
RO systems require a dedicated drinking water faucet mounted on your countertop or sink ledge.
-
Standard Hole Diameter: Most dedicated RO faucets require a 1/2-inch to 1-1/4-inch hole.
-
If your sink lacks an extra hole (such as an unused soap dispenser slot or spray hose hole), you will need to drill a hole through your countertop material (granite, quartz, or stainless steel) or select a 3-in-1 kitchen faucet.
4. Key Installation Considerations and Standards Compliance
When evaluating an under-sink installation, performance and safety standards established by independent water quality organizations provide essential benchmarks for reliable operation.
Water Pressure Requirements
According to the Water Quality Association (WQA) and standards under NSF/ANSI 58 (the primary standard for residential reverse osmosis drinking water systems), standard RO membranes perform optimally at incoming feed water pressures between 40 psi and 80 psi.
-
If your municipal water pressure is below 40 psi, production rates drop significantly and drain water waste increases. In low-pressure scenarios, factor in space for a compact booster pump.
-
If incoming pressure exceeds 80 psi, a pressure-reducing valve should be installed upstream to prevent fitting stress.
Wastewater Drain Line Routing
Every RO system generates waste brine to flush impurities off the membrane surface. The drain saddle clamp must be installed on the drain pipe above the P-trap and away from the garbage disposal discharge line to prevent backflow and drain noise. Ensure you have a 3 to 4-inch straight section of vertical or horizontal drain pipe available for mounting.
5. Finding the Right Fit for Your Kitchen
Whether you have a spacious farmhouse sink cabinet or a compact apartment kitchen with limited clearance, modern filtration designs make pure water accessible for virtually every layout.
When shopping for an under-sink water filter system, look for modular systems certified to rigorous standards. For example, Filter United offers the VIVA21 product line, engineered to maximize filtration efficiency while respecting standard kitchen cabinet dimensions:
-
VIVA21 5-Stage WQA-Certified Reverse Osmosis System: Designed for reliable, standard-footprint under-sink installations with certified multi-stage contaminant reduction.
-
VIVA21 6-Stage Remineralization Reverse Osmosis System: Incorporates an active alkaline/remineralization stage to restore natural minerals and balance water pH without requiring substantial extra cabinet space.
-
Maintenance & Replacement Support: Designed for quick servicing with available Complete Filter Sets, Pre-Filter Sets, individual replacement cartridges, and precision fittings to accommodate custom pipe routing under tight sinks.
By taking precise measurements of your cabinet dimensions, accounting for plumbing fixtures, and choosing a system certified for safety and performance, you can ensure a smooth DIY or professional installation that delivers crisp, purified water for years to come.


